 A decentralized application (DApp) that allows users to store and retrieve a number on the blockchain using a user-friendly frontend interface.
In this tutorial, we’ll walk you through creating a simple smart contract using Solidity and deploying it on a blockchain via Remix IDE. By the end, you’ll also learn how to connect your contract to a frontend built with HTML, CSS, and JavaScript, enabling interaction through a web interface.
What You’ll Learn
- Basics of Solidity smart contract development.
- Deploying a contract using Remix IDE.
- Connecting a blockchain contract to a frontend with Web3.js.
- Interacting with your smart contract through a user-friendly interface.
Prerequisites
- A basic understanding of JavaScript.
- MetaMask browser extension installed.
- A small amount of test Ethereum (e.g., from Sepolia faucets).
Setting Up Your Smart Contract
Open Remix IDE in your browser: https://remix.ethereum.org.
Create a new file named SimpleStorage.sol and paste the following code:
// SPDX-License-Identifier: MIT// This specifies the license type for the contract. The MIT license is permissive and commonly used in open-source projects.
pragma solidity ^0.8.24;
// Specifies the version of Solidity the contract is written in.
// This ensures compatibility with the Solidity compiler version 0.8.24 or above.
// Define the contract named "SimpleStorage"
contract SimpleStorage {
// Declare a state variable to store a number.
// `public` makes it readable by anyone outside the contract.
uint256 public storedNumber;
// Function to store a number in the `storedNumber` state variable.
// `_number` is the input parameter provided by the user.
function storeNumber(uint256 _number) public {
// Assign the provided number to the state variable `storedNumber`.
storedNumber = _number;
}
// Function to retrieve the value of the `storedNumber` variable.
// The `view` keyword indicates this function does not modify the contract's state.
// It returns a `uint256` value, which is the type of the stored number.
function getStoredNumber() public view returns (uint256) {
// Return the value of `storedNumber`.
return storedNumber;
}
}
Compile the contract using the Solidity compiler in Remix. Ensure you select Solidity version 0.8.24.
Deploying the Contract
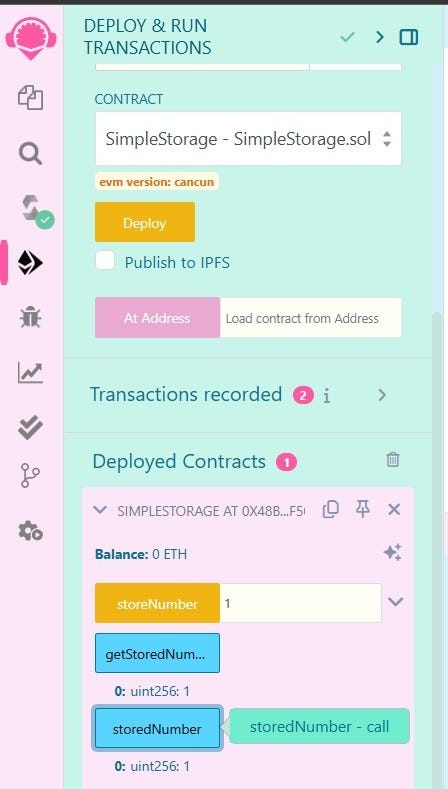
Go to the Deploy & Run Transactions tab in Remix.
Select an environment such as Injected Web3 to deploy on a testnet.
Ensure your MetaMask wallet is connected to the same test network.
Deploy the contract by clicking the Deploy button.
Copy the deployed contract’s address and ABI for later use.
Creating the Frontend
Create three files in your project folder:
- index.html
- styles.css
- app.js
HTML (index.html)
<!DOCTYPE html><html lang="en">
<head>
<meta charset="UTF-8">
<meta name="viewport" content="width=device-width, initial-scale=1">
<title>MetaMask + Animation</title>
<script src="https://cdn.jsdelivr.net/npm/[email protected]/dist/web3.min.js"></script>
<script src="https://cdnjs.cloudflare.com/ajax/libs/gsap/3.12.2/gsap.min.js"></script>
<link rel="stylesheet" href="styles.css">
</head>
<body>
<div id="message-container">
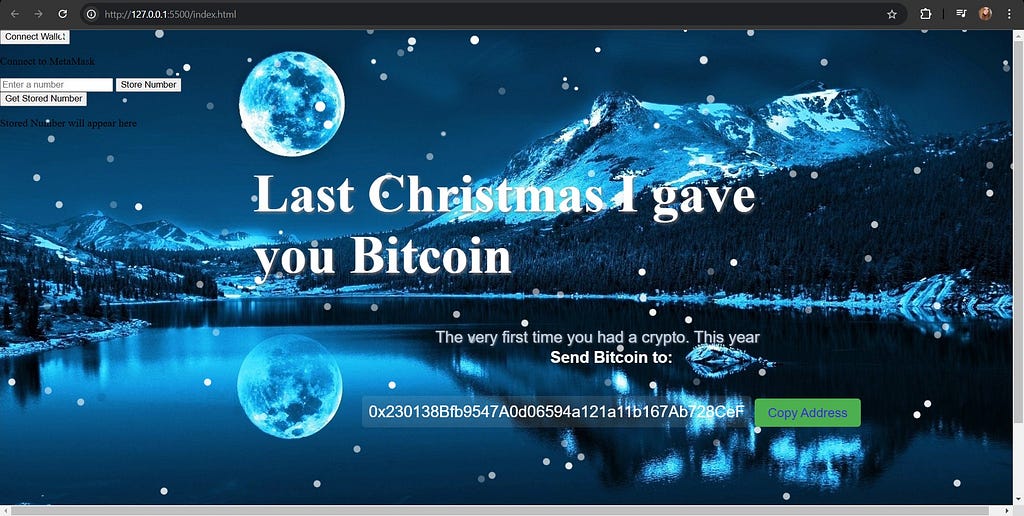
<h1>Last Christmas I gave you Bitcoin</h1>
</div>
<div id="crypto-message">The very first time you had a crypto. This year</div>
<div id="bitcoin-receive">
<h2>Send Bitcoin to:</h2>
<p id="wallet-address">0x230138Bfb9547A0d06594a121a11b167Ab728CeF</p>
<button id="copy-btn">Copy Address</button>
<p id="copy-msg" style="color: lightgreen; display: none;">Address copied to clipboard!</p>
</div>
<!-- Added Blockchain Interaction Elements -->
<div>
<button id="connect-wallet">Connect Wallet</button>
<p id="blockchain-message">Connect to MetaMask</p>
</div>
....... code continue .... see more in repo link below
CSS (styles.css)
/* General styling for the page */body {
background-image: url(https://www.pixelstalk.net/wp-content/uploads/2015/01/Winter-Night-In-Moonlight-HD-Wallpaper.jpg);
background-size: cover;
background-position: center center;
margin: 0;
padding: 0;
width: 100%;
height: 100vh;
position: relative;
}
/* Falling elements */
#container {
position: absolute;
top: 0;
left: 0;
width: 100%;
height: 100%;
z-index: 1;
pointer-events: none;
}
....... code continue .... see more in repo link below
JavaScript (app.js)
Replace YOUR_CONTRACT_ADDRESS and YOUR_CONTRACT_ABI with your contract details.
// Check if MetaMask is installedif (typeof window.ethereum !== 'undefined') {
console.log('MetaMask is installed!');
const web3 = new Web3(window.ethereum);
// Smart Contract Details
const contractAddress = "YOUR_CONTRACT_ADDRESS";
const contractABI = YOUR_CONTRACT_ABI;
....... code continue .... see more in repo link below
Running the Project
Open index.html in your browser.
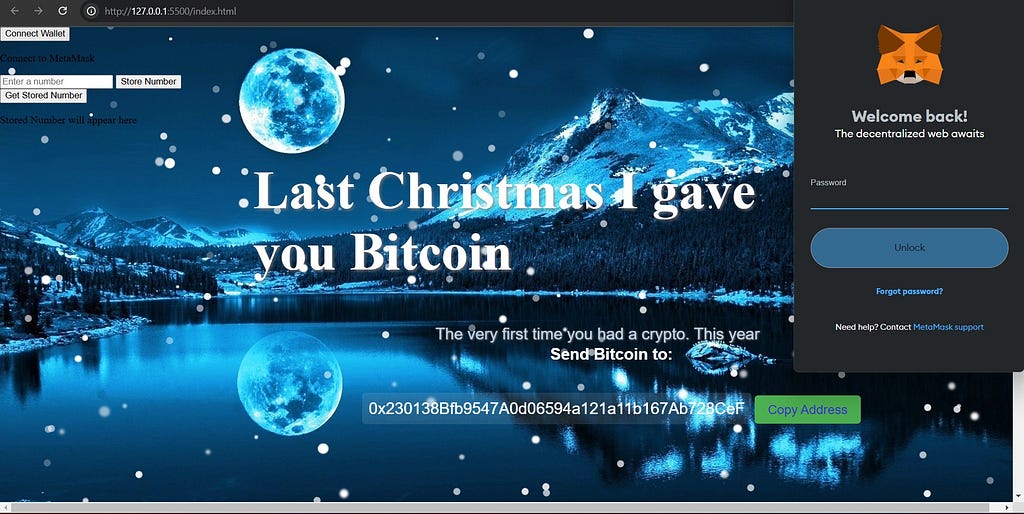
Connect your MetaMask wallet by clicking the Connect Wallet button.
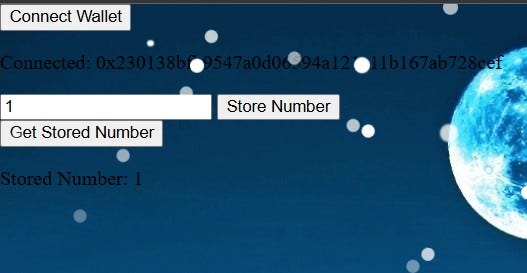
Use the Store Number button to save a number on the blockchain.
Retrieve the number using the Retrieve Number button.
 Connect Wallet MetaMask appears; choose number, press Store Number, and then press Get Stored Number
 You should get stored number
 Remix
RemixFeatures
- Connect Wallet: Securely connects a user’s MetaMask wallet to the DApp.
- Store Number: Allows users to input and save a number on the blockchain.
- Retrieve Number: Fetches and displays the stored number from the blockchain.
Technologies Used
- Remix IDE: For writing and deploying smart contracts.
- MetaMask: For wallet integration.
- Web3.js: To connect the frontend to the blockchain.
Source Code
The complete source code for this project is available on my GitHub:
GitHub Repository — Blockchain Integration Project
Simple Smart Contract Tutorial: Build a Blockchain Project Using Remix IDE was originally published in The Capital on Medium, where people are continuing the conversation by highlighting and responding to this story.

 2 months ago
45


 English (US) ·